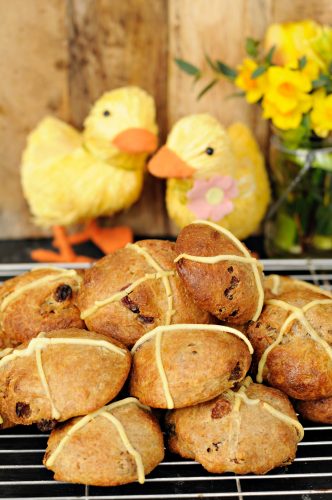
Hot Cross Spelt Buns
Serves makes 12-16 (depending on size)
Although my Hot Cross Buns don’t have a fluffy, doughy middle like traditional Hot Cross Buns, these are a delicious gluten-free alternative, absolutely ‘divine’ served warm from the oven or toasted with butter.
Please bear in mind that this recipe needs to be started the day before you want to eat your Hot Cross Buns. This is because allowing the dough to develop for at least 12 hours helps to create a lighter texture and a better tasting result. This looks like aggravation, but it really isn’t. Making the buns is just a matter of mixing the dough in a food processor – you then just need to wait patiently for the dough to rise magnificently. Well it is Easter!
Kate’s top tip
If you are seeking icing perfection, use a piping bag (or small resealable food bag with the corner snipped off) to ice the crosses. The crosses cannot be piped on to the buns until at least halfway through the cooking time. If the crosses are piped before the bun is put in the oven, the cross will split as it rises.
Brushing with the egg wash is the secret to adding a gorgeous shine to your Hot Cross Buns.
You will need a food mixer with a dough hook attachment ideally (this will save you from kneading the dough by hand) and a baking tray, lightly greased and lined with parchment paper.
What you need
For the buns
375g organic wholemeal spelt flour
6 large organic eggs
1 tsp ground cinnamon
1 tsp (5g) dried yeast
2 tbsp almond milk
2 tbsp maple syrup
1 tsp vanilla extract
½ tsp salt
250g unsalted butter, softened at room temperature
100g raisins (or dried fruit of your choice)
For the egg wash
1 large organic egg
1-2 tbsp coconut milk (depending on how many buns the mixture has yielded)
For the crosses
50g gluten-free plain flour
60-70ml cold filtered water
What you do
Day 1-
Place the spelt flour, eggs, cinnamon, yeast, almond milk, maple syrup, vanilla extract and salt into a large mixing bowl.
Mix the dough for seven to ten minutes on the lowest setting until it is smooth and elastic.
Dice the butter into small cubes and gradually add it to the dough mixture a cube at a time whilst the mixer is still going. Do not add a further cube until you see that the previous one has been incorporated.
Turn off the mixer and fold through the dried fruit.
Cover the bowl with cling film and allow it to rest at room temperature for approximately one hour.
Place the covered bowl in the fridge and leave for a further 12 hours.
Day 2
Depending on what size bun you would prefer to end up with, divide the dough into 12 to 18 pieces of equal size. Shape with your hands and leave the buns on a baking tray lined with parchment paper.
Cover the baking tray with cling film and allow the dough to rest at room temperature for another 30 minutes or until the buns have doubled in size.
When you are ready to bake your buns, pre-heat the oven to 170˚C.
Make an egg wash by stirring together the egg and the milk until well combined.
Remove and discard the cling film and brush the top of each bun with a little egg wash.
Place in the pre-heated oven for approximately 15 minutes.
Meanwhile, mix together the flour and water until smooth. The mixture should have a similar consistency to a thick wallpaper paste. It should also have reached the ‘ribbon stage’ whereby when you lift a spoon into the air, the mixture will fall back into the bowl in ribbons, which slowly disappear back into the mixture.
Remove the buns from the oven and working quickly, pipe a cross onto the top of each bun.
Place the buns back in the oven and continue to cook for a further five to ten minutes keeping your eye on them until the buns are golden in colour and the crosses are evenly cooked.
Remove the buns from the oven and transfer to a wire rack until they are cool enough to handle.


